How to Cut Out Your Headshot Into a Transparent PNG File

If you’ve ever seen a headshot that’s been pasted (without a background) on to an internet graphic, business card, or brochure, you might have wondered how that photo was created.

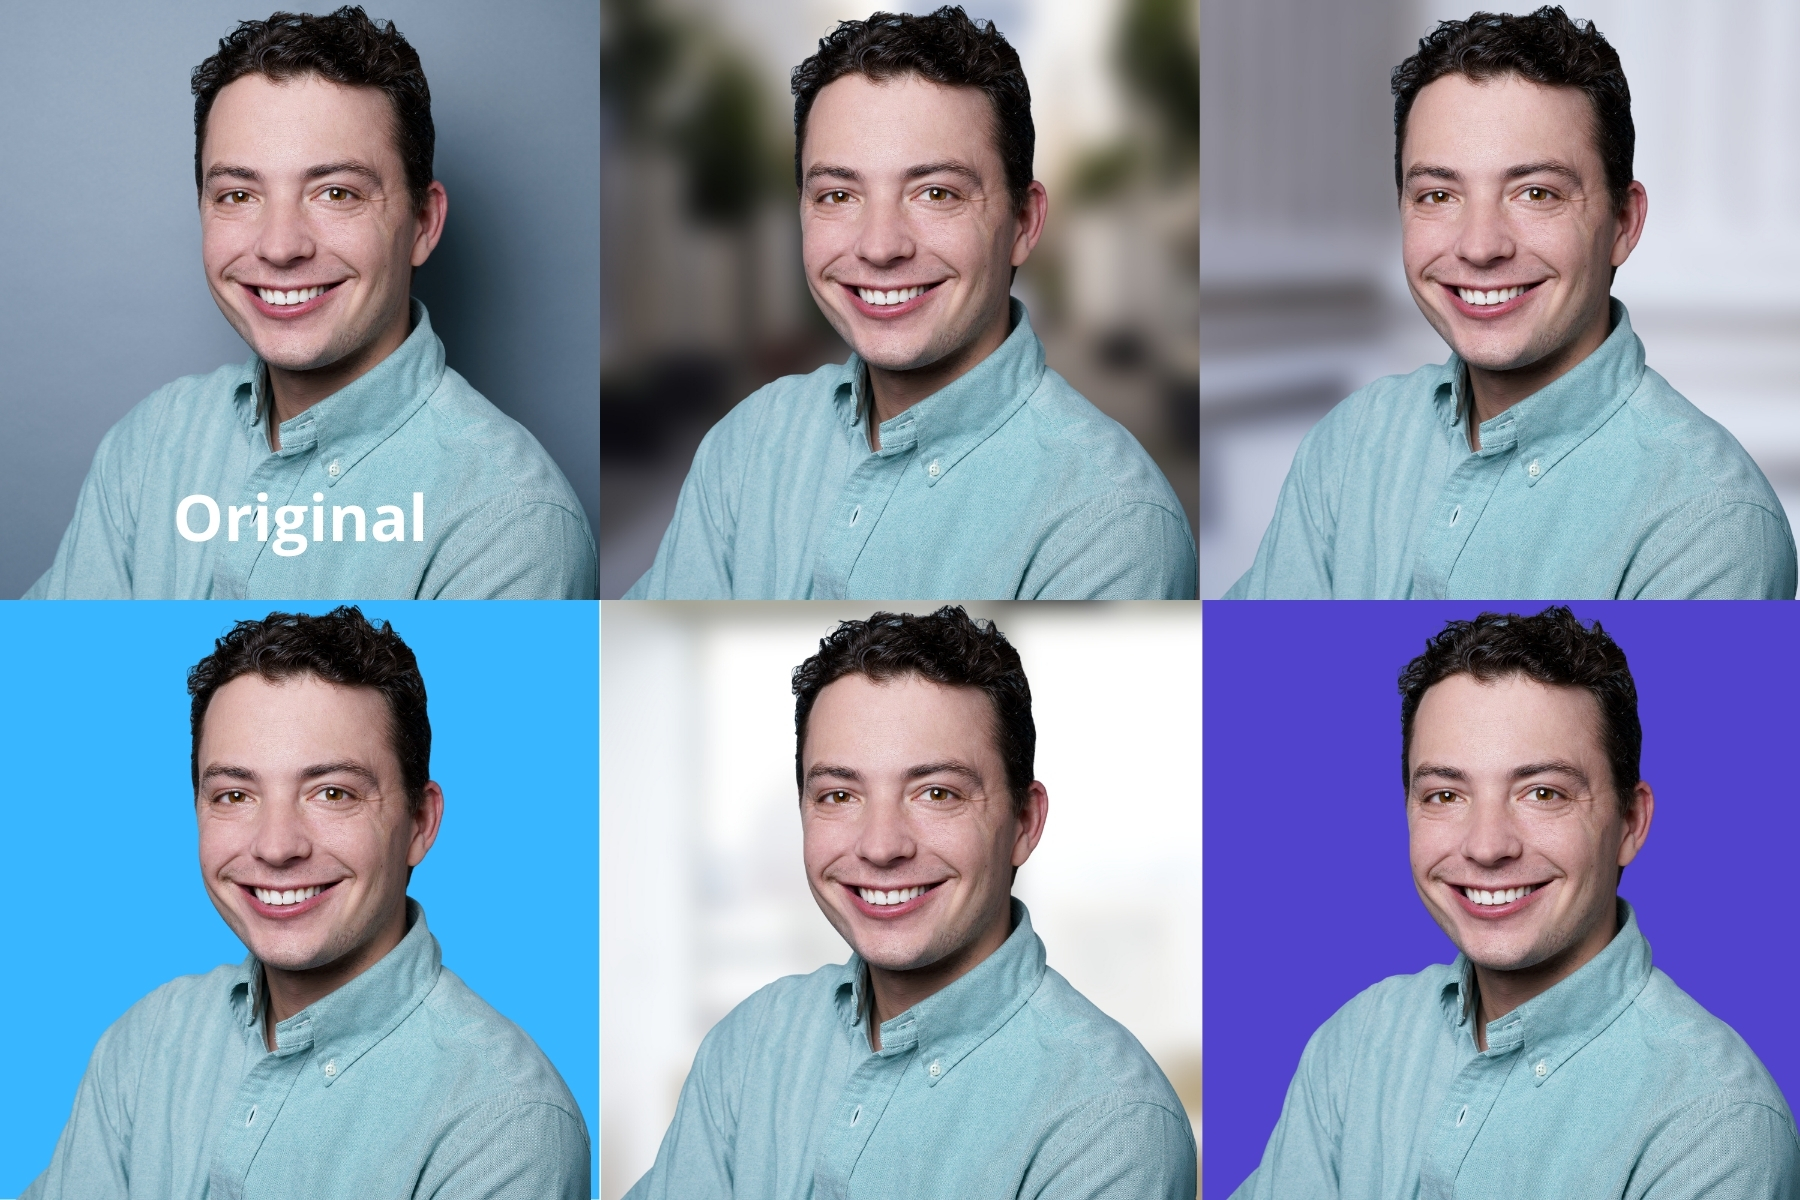
Headshots with a transparent background are a wonderful marketing asset to have in your arsenal. They can be used in a wide range of media to add a personal and friendly touch.

Traditionally, photographers and editors would need to use Photoshop (or other technical editing tool) to cut out the background of photos. It’s a long and tedious process.

But these days, anyone can create a headshot with a transparent PNG by using one of several user-friendly graphic design platforms. Since your headshot won’t have a background, you can place it in a variety of places on websites and print materials.

In this article, we’re covering how you can use Canva to turn your headshot into a highly versatile transparent PNG:

How To Create A Headshot With Transparent PNG

Before we get started, you should know that not all photos will work well for this process. In order to get a really clean cut-out, you’ll need as much contrast between you (skin, clothing, and hair) and your background as possible. A solid white background is typically best.

Step 1: Sign up for a free Canva.com account.

Step 2: Start a new project that’s 2250 pixel x 2250 pixel size.

This isn’t a hard and fast rule. If you need other dimensions, just use those. But, don’t size your project too small or the final image will be grainy. If you size your project too big, most online platforms will either reject the file or compress it (looks bad). The above size works perfect for most profile photos on social-media.

Step 3: Click on “Uploads” in the left side bar and upload your headshot.

Step 4: Click on “Elements” and then find “grids”, there’s an object that’s just one panel, click on that one.

Step 5: Go back to “Uploads”, drag and drop your headshot from that section into the grid panel you just added.

Step 6: Click on your headshot, and then click on the “Effects” button at the top of the editor.

Step 7: Click on “Background Remover” on the top left.

Step 8: Boom! You’re done.

If you’d like a transparent PNG, just click “Download” on the top right and then click “Transparent Background” and then “Download” again.

Optional: If you want to add a different background to your headshot, you can also add another Grid panel to the background and swap in another photo. The most common backdrops would be a city or office. If the background photo is taken in sharp focus, we recommend adding the “Blur” effect to that panel at 35% to 45% strength.

That’s a wrap! Follow the steps here, and you can liberate your headshot from its background and use it wherever you like. 
Recent Posts

Why Invest in Group Headshots for Your Team?

Why Invest in Group Headshots for Your Team?

Delivering great first impressions and maintaining quality in a relationship is something every business strives for on every sales call and client meeting. Keeping your group corporate headshots updated helps you start that relationship on the right foot and helps...

Let’s Get Social: San Francisco

Let’s Get Social: San Francisco

HeadShots Inc is making a big push to share the latest news, promotions, and offers on all of our social channels. For customers and followers who want to see the latest content, please feel free to follow us at the below links: Facebook: Facebook Profile LinkedIn:...

That’s a Wrap!: Series 1

That’s a Wrap!: Series 1

We had a blast at Square Unboxed Conference last Thursday. Square Inc invited us to host over 120 participants through short sessions designed to get high quality business headshots. Here were some of our key take-aways: Take-Away #1: Short Headshot Sessions Can Work...

Why is My LinkedIn Profile Photo Blurry?

Why is My LinkedIn Profile Photo Blurry?

There is almost nothing that breaks our hearts more than a blurry LinkedIn headshot. After spending time and money on a high-resolution portrait, some people have reported that their profile photo looks “blurry” on LinkedIn. And there’s been a major uproar recently...

The Business Case for Company Headshots

The Business Case for Company Headshots

Ask any Vice President of Sales in a major corporation "Do first impressions matter?" when meeting customers, and they will undoubtedly respond "of course." She will tell you that earning credibility with customers from the very first engagement is absolutely critical...

Are Professional Headshots Important? [Video Report]

Are Professional Headshots Important? [Video Report]

When you were growing up, you probably remember your mom or dad reminding you, before a big job interview or first day at school, of the importance of first impressions. Dress nice. Smile when meeting people. Make eye contact. But, these days, most first impressions...

8 Types of Hilariously Bad LinkedIn Profile Photos: Updated 2020

8 Types of Hilariously Bad LinkedIn Profile Photos: Updated 2020

Note: To avoid shaming anyone, we didn't include real examples from real people. Instead, we had the cartoonists depict our favorite (most hated) bad LinkedIn headshots. For those of you who have one of these photos, you know who you are... LinkedIn is the world’s...

Ultimate LinkedIn Cover Photo Guide: Updated for 2021

Ultimate LinkedIn Cover Photo Guide: Updated for 2021

In many ways, your LinkedIn cover photo says a lot about you. From a visual standpoint, your cover photo takes up about 20% of the real-estate on the screen when you open your profile - which is larger than any other single object on your profile. So while it's not as...

What’s Included With HeadShots Inc Editing

What’s Included With HeadShots Inc Editing

If it's your first time getting your professional headshot taken, you might be wondering what "retouching" or "airbrushing" means on our pricing page. In fact, some people come into our studio without knowing that the service is included with their session. Simply...

So I Got My HeadShot – Now What?​

So I Got My HeadShot – Now What?​

Great question. It’s time to get the most out of your new professional headshot. First, take stock of all platform or channels that currently have your old photo. These likely include, but are not limited to: 1) LinkedIn.com 2) Email Profiles 3) Internal Company...